How to Brown Butter: Unlocking Nutty, Rich Flavor for Any Dish
Imagine a secret ingredient that effortlessly elevates everything it touches, from simple cookies to sophisticated sauces. This isn't a rare spice or an exotic oil; it's humble butter, transformed. Learning how to brown butter is one of the easiest culinary techniques you can master, yet it yields a profound depth of flavor that can redefine your cooking. Often called *beurre noisette* by French chefs, this golden liquid infuses a warm, toasty, and distinctly nutty essence that is utterly irresistible. If you’ve never experienced the magic of brown butter, prepare to be amazed. This guide will walk you through the simple steps to achieve perfect brown butter every time, along with expert tips to ensure success and inspire your next culinary creation.What Exactly is Brown Butter, and Why is it So Flavorful?
At its heart, brown butter is simply butter that has been gently cooked to toast its milk solids. Regular butter is an emulsion of butterfat, water, and milk solids. When you heat butter, the water content rapidly evaporates, leaving behind the butterfat and those crucial milk solids. As these solids continue to cook, they undergo a process called the Maillard reaction – the same chemical transformation responsible for the irresistible browning of seared steaks, roasted coffee beans, and toasted bread. This reaction caramelizes the proteins and sugars in the milk solids, creating hundreds of new flavor compounds. The result? A liquid gold with a complex aroma and taste profile reminiscent of toasted hazelnuts, warm caramel, and a hint of butterscotch. It’s far richer and more nuanced than plain melted butter, offering a deeper, more sophisticated foundation for both sweet and savory applications. It's truly a testament to Unlock Magical Flavor: The Power of Brown Butter Explained.Essential Tools for Browning Butter Successfully
The beauty of browning butter lies in its simplicity, requiring minimal equipment. Here's what you'll need: *Butter:
The star of the show! You can use either salted or unsalted butter; just be mindful of the salt content if using salted butter in a recipe. Feel free to scale the quantity – whether you need a single stick or several, the process remains the same. *Skillet or Saucepan:
A sturdy pan with a light-colored bottom is highly recommended. The light color makes it significantly easier to observe the subtle color changes of the butter, preventing accidental burning. A stainless steel pan is ideal. *Heat-Proof Spatula or Wooden Spoon:
Essential for stirring the butter evenly and scraping the bottom of the pan to prevent solids from sticking and burning. *Heat-Safe Bowl:
Crucial for immediately transferring the finished brown butter to stop the cooking process. Glass, ceramic, or metal bowls work perfectly.How to Brown Butter: A Simple Step-by-Step Guide
Ready to transform your butter? Follow these easy instructions for perfectly browned butter.- Melt the Butter: Cut your butter into even pieces (this helps it melt uniformly) and place it in your chosen skillet. Set the skillet over medium heat. Resist the urge to turn the heat up higher, as patience here is key to preventing burning.
- Observe the Foam: As the butter melts, it will begin to sizzle and foam. Swirl the pan occasionally and stir with your spatula to ensure even heating. This foaming indicates that the water content is evaporating.
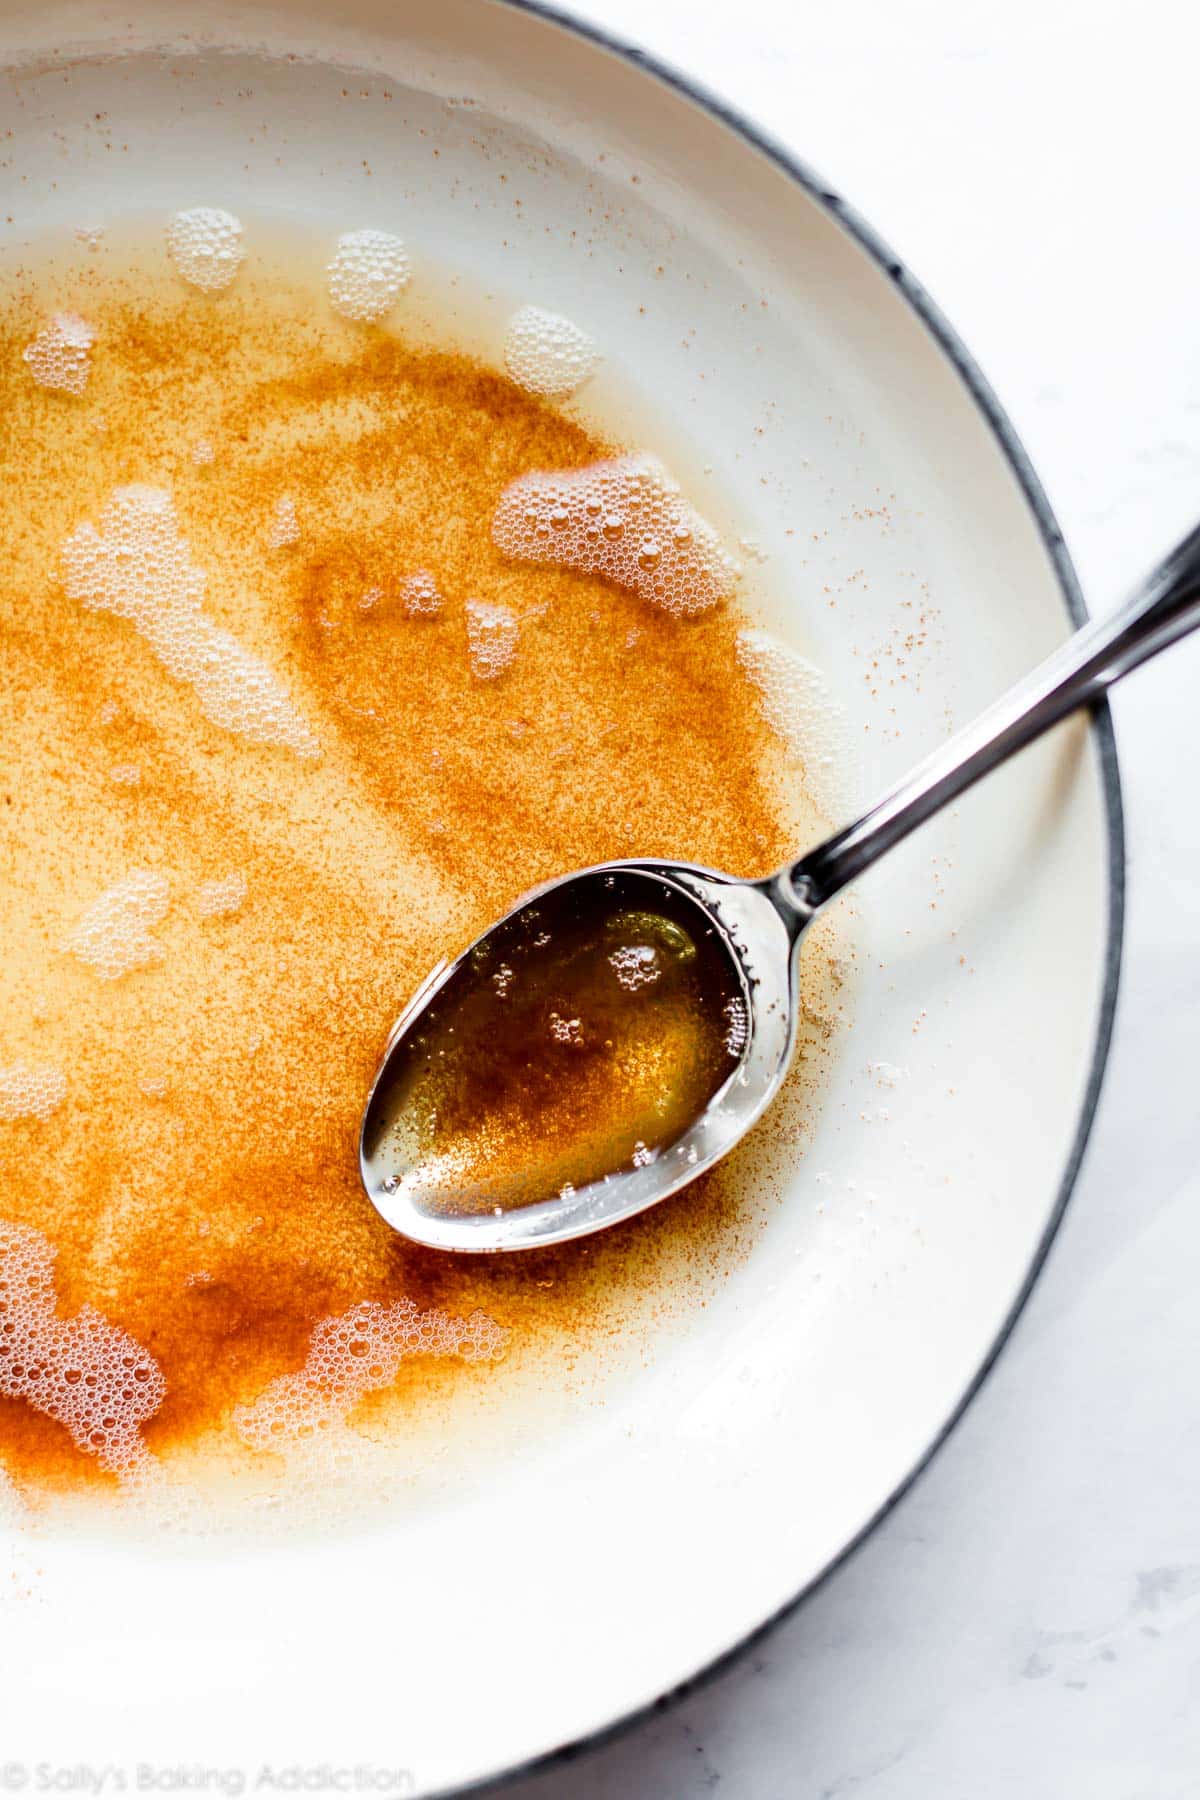
- Keep Cooking and Stirring: Continue to cook and stir. The foam will eventually begin to subside, and you'll notice small, golden-brown flecks forming at the bottom of the pan. The liquid butter itself will transition from a pale yellow to a rich, golden amber color. This is where your light-colored pan really helps!
- Trust Your Nose and Eyes: As the butter reaches its prime, it will emit a wonderfully fragrant, nutty aroma – think toasted nuts or warm caramel. Visually, the flecks at the bottom will turn a deep golden-brown, and the overall color of the butter will be a beautiful amber. This entire process typically takes 5-10 minutes, depending on the amount of butter and your stove's heat.
- Immediate Transfer is Critical: The moment you smell that intoxicating nutty aroma and see the desired golden-brown flecks and amber color, immediately remove the pan from the heat. Pour the browned butter (including all those delicious toasted milk solids) into your heat-safe bowl. This step is non-negotiable, as the residual heat in the pan will continue to cook the butter and can quickly turn it from perfectly nutty to burnt and bitter.
- Use or Store: At this point, your brown butter is ready to use! You can incorporate it into your recipe while still warm and melted, or allow it to cool and re-solidify for later use.
Mastering Brown Butter: Expert Tips for Success
While the process is straightforward, a few key insights can elevate your brown butter game and help you avoid common pitfalls. For even more in-depth advice, explore Perfect Brown Butter: Essential Tips to Avoid Burning.Temperature Control is King
As mentioned, medium heat is your best friend. High heat will cause the water to evaporate too quickly, making the milk solids brown unevenly and burn before the desired flavor develops. It’s a delicate balance; too low, and it takes forever; too high, and you risk burning. Stick to medium, and give it time.
The Power of Observation: Sight, Sound, and Smell
- Sight: Don't rely solely on color from the top. Use your spatula to scrape the bottom of the pan and check the color of the milk solids. They will be the first to brown.
- Sound: Initially, the butter will sizzle quite loudly as the water evaporates. As it browns, this sizzling will quiet down. This change in sound is a subtle cue that you’re nearing the finish line.
- Smell: This is arguably the most reliable indicator. That rich, nutty, almost caramel-like aroma is unmistakable and tells you it's time to act quickly.
Continuous Stirring Prevents Burning
Keep that spatula moving! Stirring constantly ensures that the butter heats evenly and prevents the milk solids from settling at the bottom of the pan and burning. It also helps expose all the milk solids to the heat for uniform browning.
Never Walk Away!
Browning butter demands your full attention. The difference between perfectly browned and horribly burnt can be a matter of seconds. Stay by the stove, observe, stir, and be ready to remove it from the heat the moment it's done.
The Light-Colored Pan Advantage
Seriously, this makes all the difference. In a dark-bottomed pan, those precious golden flecks are nearly impossible to discern until it's often too late. A light-colored pan provides a clear visual cue, allowing you to react precisely when needed.
Scrape Every Last Bit
When transferring the butter, be sure to scrape all the browned bits from the bottom of the pan into your bowl. These little toasted milk solids are where a huge amount of that incredible flavor resides!
What if it Burns?
Don't despair! If you accidentally burn your butter (it will smell acrid and taste bitter), simply discard it, clean your pan, and start again. It happens to the best of us, and practice makes perfect.
Unlocking Flavor: Creative Uses for Brown Butter
Once you’ve mastered how to brown butter, a world of culinary possibilities opens up. Its rich, complex flavor enhances both sweet and savory dishes in delightful ways.Sweet Applications:
- Baked Goods: Brown butter is a game-changer for chocolate chip cookies, blondies, brownies, cakes, and muffins. It adds incredible depth and chewiness.
- Frostings & Glazes: Incorporate it into buttercream, cream cheese frosting, or simple glazes for a sophisticated twist.
- Dessert Sauces: Drizzle over ice cream, pancakes, waffles, or crepes for an instant upgrade.
Savory Applications:
- Pasta Dishes: A classic pairing with sage in a simple brown butter sauce for ravioli or gnocchi.
- Vegetables: Toss with roasted asparagus, green beans, Brussels sprouts, or mashed potatoes for an instant boost of flavor.
- Fish & Seafood: Drizzle over pan-seared scallops, white fish, or shrimp.
- Soups & Sauces: Use as a base for velouté or hollandaise, or swirl into puréed vegetable soups.
- Popcorn: A truly gourmet popcorn experience!
Storing Brown Butter
You can use brown butter immediately, or store it for later.- Refrigeration: Once cooled, brown butter will re-solidify. Store it in an airtight container in the refrigerator for up to 2 weeks. You can then scoop or melt it as needed.
- Freezing: For longer storage, freeze brown butter in an ice cube tray. Once frozen, transfer the cubes to a freezer-safe bag or container and store for up to 3 months.
